
Welcome to your guide on making delicious chive pockets. This savory pastry is loved in the United States. You’ll learn how to make homemade chive pockets with our easy recipe. We aim to help you become a pro at making perfect chive pockets.
On this culinary journey, you’ll explore the world of chive pockets. You’ll learn about their history and how to make the perfect dough and filling. This guide is for everyone, whether you’re an experienced chef or just starting out.
In this guide, you’ll find a detailed recipe and a table of ingredients. We want to give you the tools and knowledge to make irresistible chive pockets. These savory pastries are sure to please your taste buds.
Understanding Chive Pockets: A Delicious Asian-Inspired Treat
Chive pockets have a rich history in Asian cultures. They started in traditional Asian cuisine and have changed over time. Now, they come in many flavors and textures, perfect for any meal.
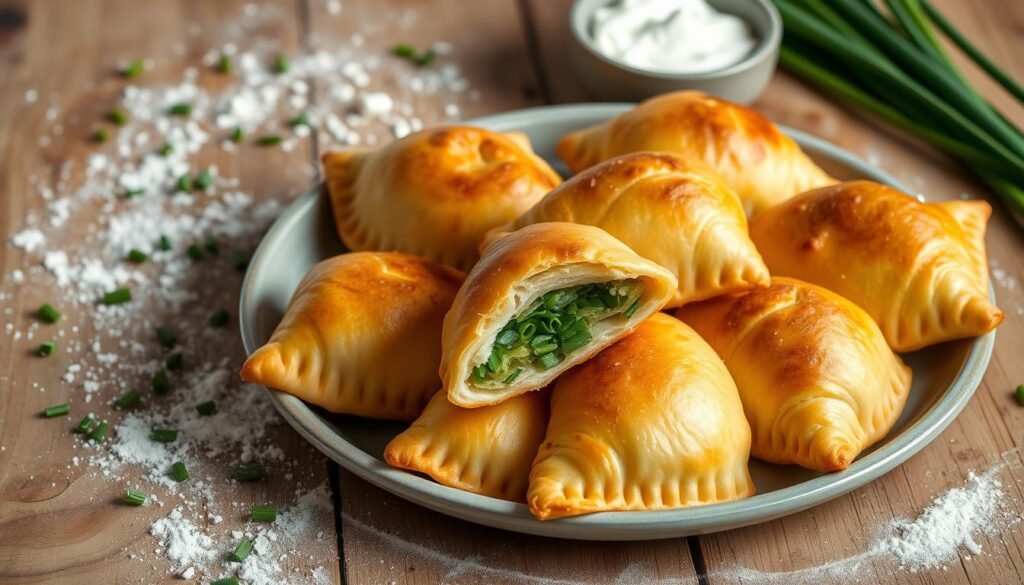
These pockets are great because you can fill them with many things. You can use classic chive filling or try new ones like chive and cream cheese. Finding the right filling and dough is easy and fun.
- Steamed chive pockets with a light and fluffy dough
- Pan-fried chive pockets with a crispy exterior and a savory filling
- Baked chive pockets with a golden brown crust and a creamy filling
Learning about chive pockets’ history and variations is interesting. It shows how diverse and complex they are. Whether you’re experienced or new to cooking, trying different recipes is rewarding. It lets you create your own special flavors and traditions.
Essential Ingredients for Perfect Chive Pockets
To make tasty chive treats, you need the right ingredients. These will help you create delicious chive snacks for any event. The secret to great chive pockets is using top-notch ingredients and balancing flavors.
Choosing the right ingredients is crucial for chive pockets. You’ll need all-purpose flour for the dough, chives for the filling, and cream cheese for richness. Don’t forget salt and black pepper for flavor.
Here’s a basic list to start:
- 2 cups all-purpose flour
- 1/2 cup chives, chopped
- 8 ounces cream cheese, softened
- 1/2 teaspoon salt
- 1/4 teaspoon black pepper
Feel free to adjust these amounts as you try new fillings and doughs. This way, you can make your own special chive treats.
Here is a table to help you plan your ingredients:
| Ingredient | Quantity |
|---|---|
| All-purpose flour | 2 cups |
| Chives, chopped | 1/2 cup |
| Cream cheese, softened | 8 ounces |
| Salt | 1/2 teaspoon |
| Black pepper | 1/4 teaspoon |
With these ingredients, you’re ready to make tasty chive bites and snacks. They’re sure to be a hit.
Kitchen Tools and Equipment You’ll Need
To make delicious crispy chive parcels, you’ll need the right tools. These tools will help you create a savory pastry perfect for appetizers. Start by gathering must-have utensils like a mixing bowl, a rolling pin, and a pastry brush.
For preparing ingredients, some optional tools can be very helpful. A food processor can chop chives quickly. A pastry cutter helps make uniform shapes for your crispy chive parcels. Setting up your workspace efficiently is also key. It helps you work smoothly and keeps all ingredients and tools within reach.
Must-Have Utensils
- Mixing bowl
- Rolling pin
- Pastry brush
Optional but Helpful Tools
- Food processor for chopping chives
- Pastry cutter for creating uniform shapes
With the right kitchen tools and equipment, you can make delicious chive-filled dumplings. These savory pastries are perfect as an appetizer or snack. They’re sure to impress everyone.
Preparing the Perfect Chive Filling
To make an easy chive pocket recipe, start with a balanced filling. Mix chopped chives with softened cream cheese. Add seasonings or ingredients you like for a smooth flavor.
Try different mix-ins for your filling. Add garlic, onion, or herbs for a unique taste. Use feta or parmesan cheese for a special twist.
A chive and cheese pastry is a classic favorite. Add grated cheese to the filling for a rich flavor. Then, wrap it in flaky pastry for a buttery taste.
Here are some tips for your filling:
- Use fresh, high-quality ingredients for the best taste.
- Avoid overmixing to keep the filling soft and light.
- Experiment with seasonings and ingredients to find your favorite.

Follow these tips and try new chive pocket ideas. You’ll make a delicious easy chive pocket recipe that everyone will love. Get creative and soon you’ll be a pro at making chive and cheese pastry!
Mastering the Dough for Your Chive Pockets
To make tasty chive pastry, mastering the dough is key. You need the dough to be smooth and easy to work with. This ensures your chive-filled pastries turn out just right.
When making the dough, use the right flour to water ratio. Make sure your ingredients are at room temperature. This helps you get the dough’s perfect consistency. Here are some tips to keep in mind:
- Use a mix of all-purpose flour and cold water for a smooth dough.
- Avoid overworking the dough to prevent it from becoming tough.
- Let the dough rest for at least 30 minutes to relax the gluten.
By following these tips, you’ll make a delicious chive pastry. It’s perfect for serving as savory chive bites. Keep your ingredients fresh and your technique consistent for the best results.
With practice and patience, you’ll get the dough right for your chive pockets. Your chive-filled pastries will impress everyone. They’re great as a snack or part of a meal.
Step-by-Step Assembly Instructions
To make a tasty party snack, start by rolling out your dough. Use a pastry cutter or a glass rim to make uniform shapes. Place a spoonful of chive filling in the center of each shape.
Brush the edges with water, then fold the dough over to form a pocket. Press the edges together to seal it. Use a fork to crimp them for a decorative touch.
Assembling your chive pockets is easy. With these easy chive pocket appetizers, you’ll be the star of any gathering. Here are some tips to keep in mind:
- Handle the dough gently to avoid tearing.
- Don’t overfill the pockets, as this can make them difficult to seal.
- Use a variety of fillings to create different flavor combinations.
For more information on creating delicious pan-fried pork and chive dumplings, visit redhousespice.com for a step-by-step guide. With these tips and a little practice, you’ll be making tasty party snack like a pro in no time.

Cooking Methods and Timing
There are many ways to cook your chive pastry pockets. You can choose a method that suits your taste. For example, you can make chive and cheese pockets by pan-frying them. This makes the pastry golden brown and delicious.
Try pan-frying your chive puff pastry pockets in a little oil until they’re golden. This method gives a crispy outside and a soft inside. Or, you can steam-fry them for a healthier option. This keeps the nutrients and flavors of the filling.
Pan-Frying Technique
Pan-frying is a favorite way to cook chive pastry pockets. Heat some oil in a pan over medium heat. Then, add your chive pastry pockets and cook until they’re golden brown. You can also add seasonings to the oil for extra taste.
Steam-Frying Method
Steam-frying is another excellent choice for cooking chive and cheese pockets. It combines steam and oil for a crispy outside and soft inside. To steam-fry, add oil to a pan, then add your chive pastry pockets. Cover the pan with a lid.

Oven-Baked Alternative
For an easy option, bake your chive puff pastry pockets in the oven. This method makes the pastry golden without much effort. Preheat your oven to 400°F (200°C). Place your chive pastry pockets on a baking sheet and bake for 15-20 minutes, or until golden brown.
Storage and Reheating Tips
After making your chive pockets, it’s important to store them right. This keeps them fresh and tasty. You can keep them in an airtight container in the fridge for up to three days. For longer, freezing is a good option.
To freeze, put them on a baking sheet lined with parchment paper and freeze until solid. Then, move them to a freezer-safe bag or container. When you’re ready, pan-fry or bake them until crispy and hot. This keeps them crispy on the outside and flavorful inside.
Freezing Instructions
- Place chive pockets on a baking sheet lined with parchment paper
- Put them in the freezer until solid
- Transfer them to a freezer-safe bag or container
Best Practices for Leftovers
When reheating leftovers, make sure they reach 165°F. This is true for all your chive pocket creations. By following these tips, you can enjoy your chive pockets longer while keeping them tasty.

| Storage Method | Storage Time | Reheating Method |
|---|---|---|
| Refrigerator | Up to 3 days | Pan-frying or baking |
| Freezer | Up to 3 months | Pan-frying or baking |
Serving Suggestions and Accompaniments
There are many ways to serve your savory pastry chive pockets. They make a great easy appetizer for parties or a tasty finger food at gatherings. Try them with a dipping sauce like soy sauce or sweet chili sauce for extra flavor. You can also pair them with a salad or soup for a fuller meal.
Here are some ideas to start:
- Serve chive pockets as an appetizer recipe at your next dinner party
- Offer them as a finger food at a wedding or baby shower
- Pair chive pockets with a bowl of soup for a satisfying lunch
- Enjoy them as a snack on their own or with a side of fruit or cheese
For inspiration, check out 
Remember, the fun is in being creative with serving chive pockets. Try different dipping sauces and sides to find your favorite. With their savory pastry and tasty filling, they’re a hit at any event.
Conclusion: Your Journey to Chive Pocket Mastery
Making chive pockets is an art that you can master. You’ve learned about their history and cultural importance. You also know how to make the dough and filling.
Now, you can create your own delicious homemade chive pockets. The secret to success is trying different flavors and techniques. This way, you’ll find what you like best.
Chive pockets are great as an appetizer, snack, or main dish. They will impress your family and friends. Enjoy the pride of making homemade treats that taste like authentic Chinese cuisine.
Keep practicing and trying new things. Your culinary journey is just starting. Every bite will be a new adventure!